MAZE
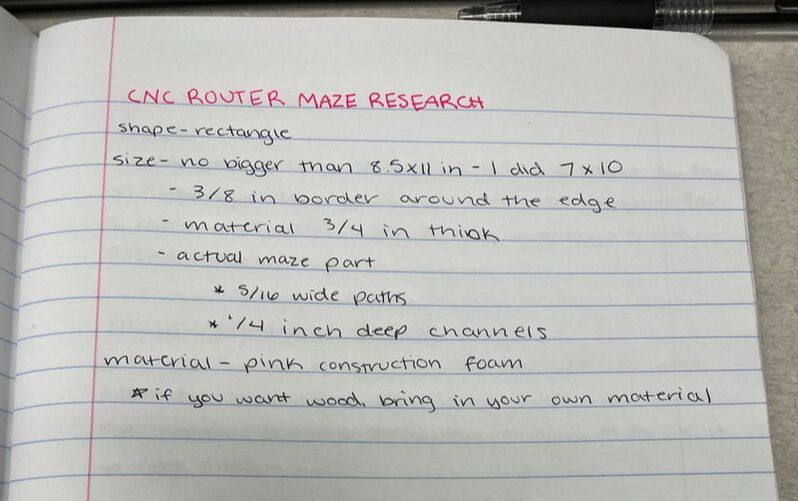
Before actually starting designing, I did some pre research in my designer notebook.

|
|
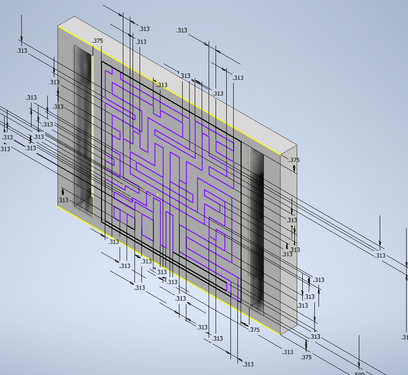
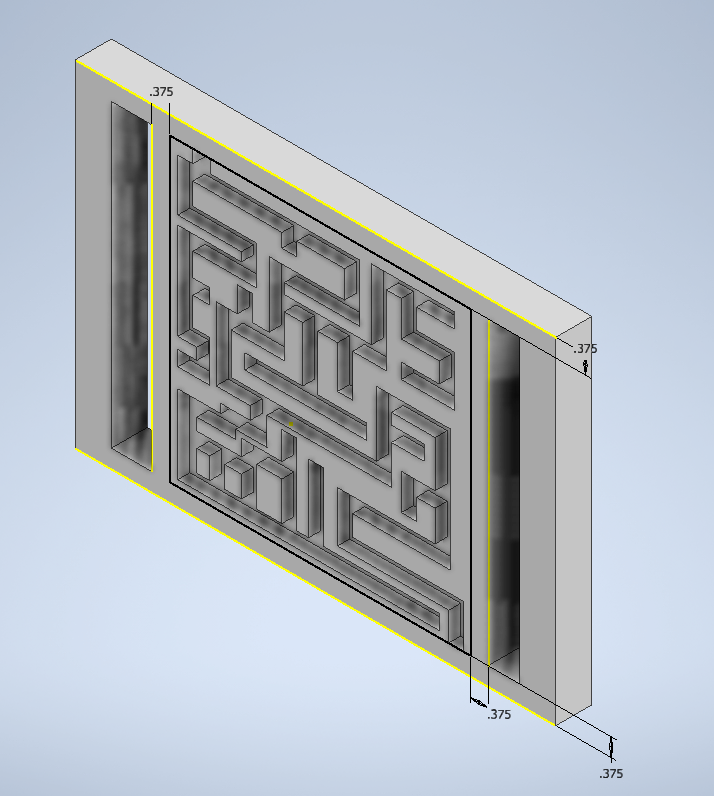
To create my maze, I first had to create the base of the maze. Once I was finished with the base layer, I had to create a new sketch for the actual maze part. I used the line tool to draw the whole maze. After it was all drawn, I used the dimension tool to make sure all of the paths were the right thickness.
|
|
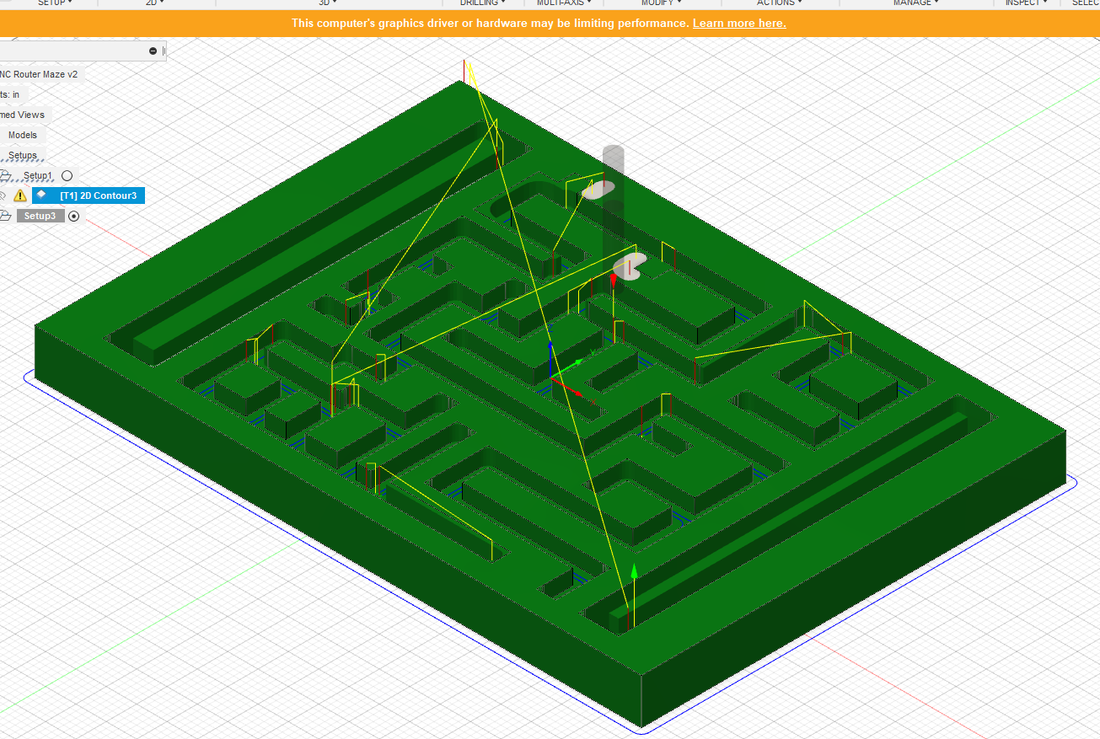
When I was finished adding dimensions, I made sure the entire path was a closed shape and extruded it into the base 1/2 inch. This is the finished maze. After I was finished on Inventor, I put my maze into Fusion and set up the stock and tool paths. This was a challenging process but eventually I got it as close as it was going to get.
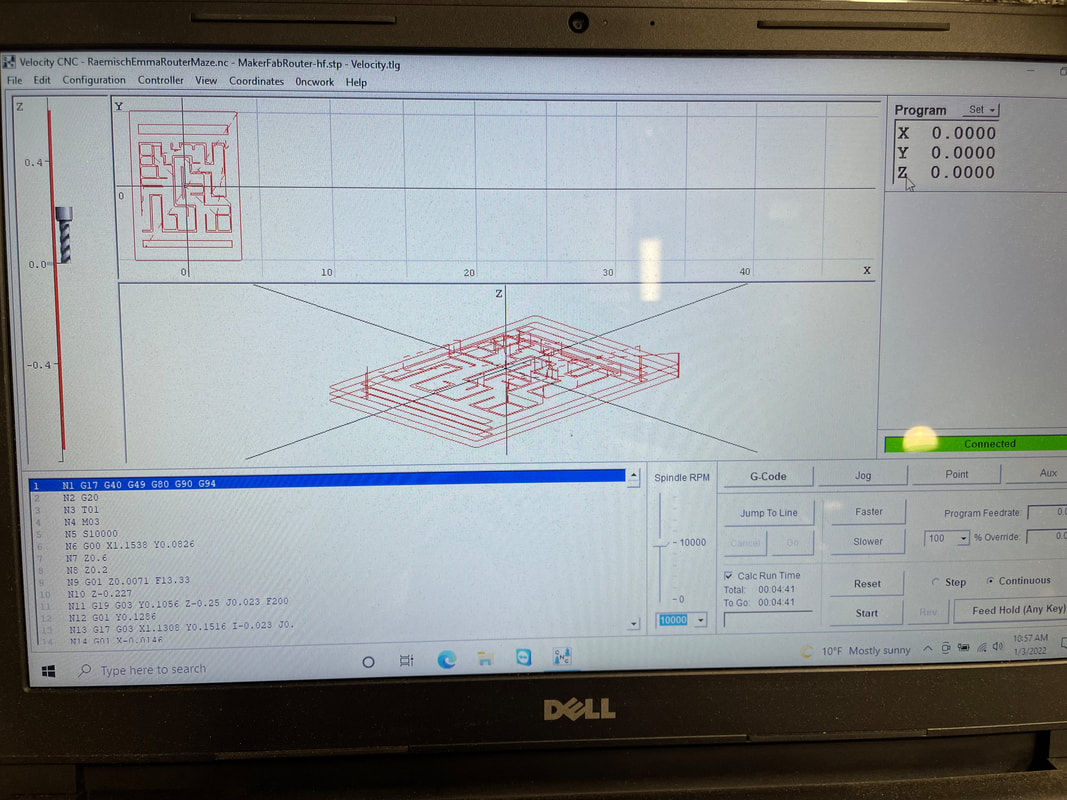
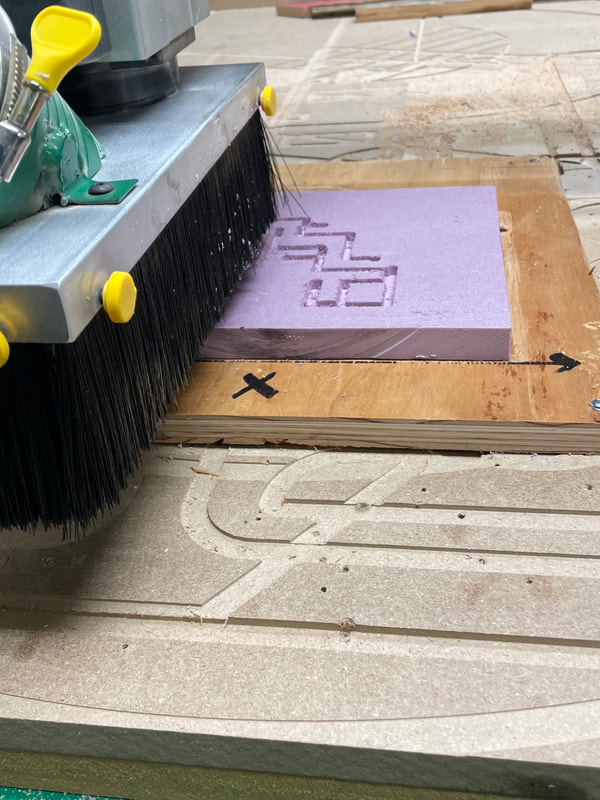
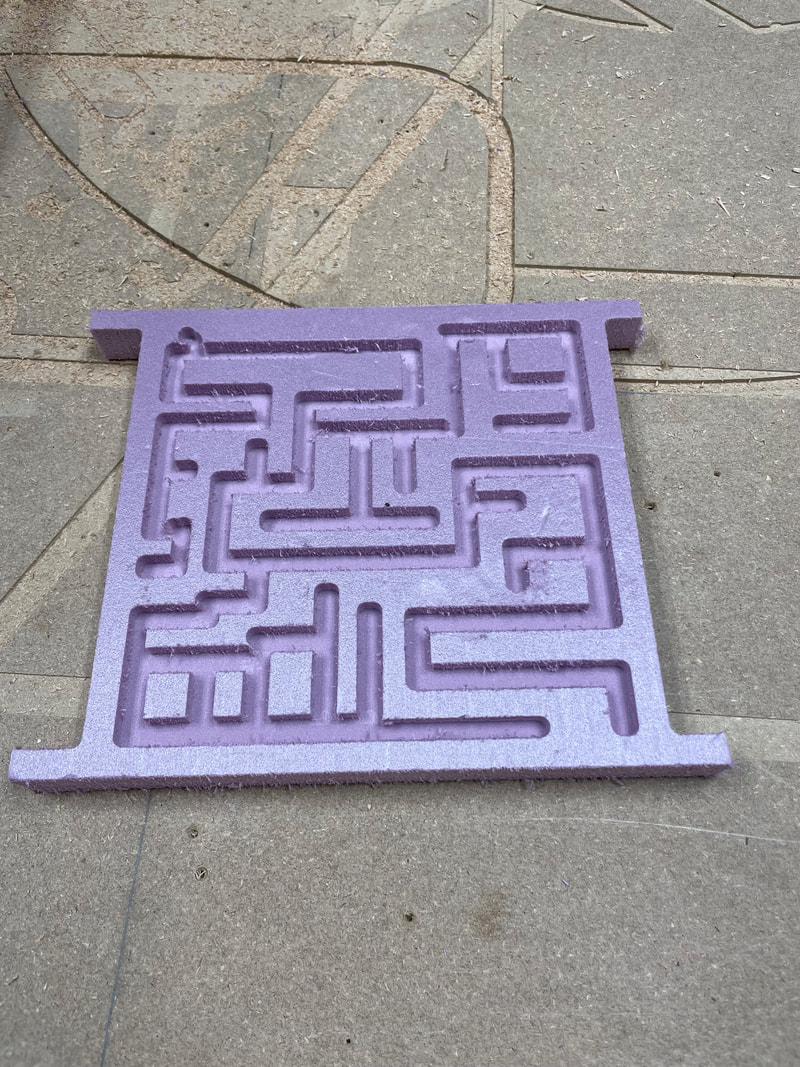
At the router, I plugged my flash drive into the computer and loaded it into the program. Once I had the drill piece lined up with the center of the maze, I pressed play and watched as my maze was cut out. I didn't have the foam piece facing the right way so the handles on the outside got cut off but it's okay because I still think it looks fine.
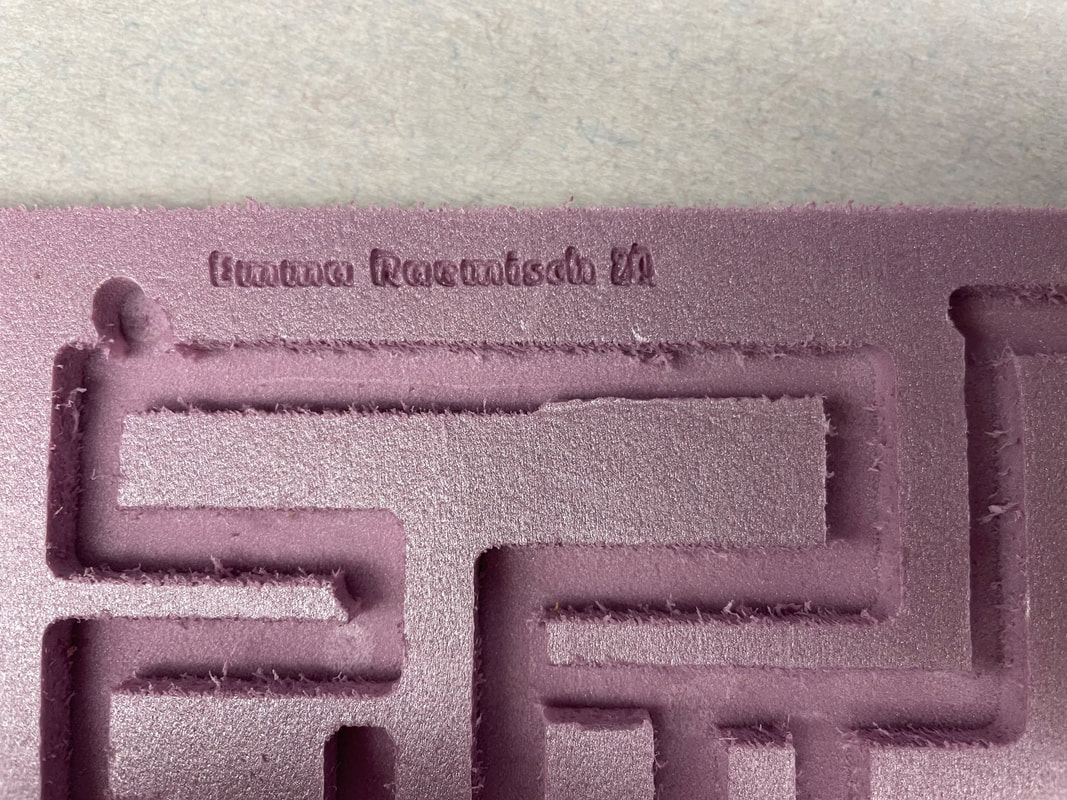
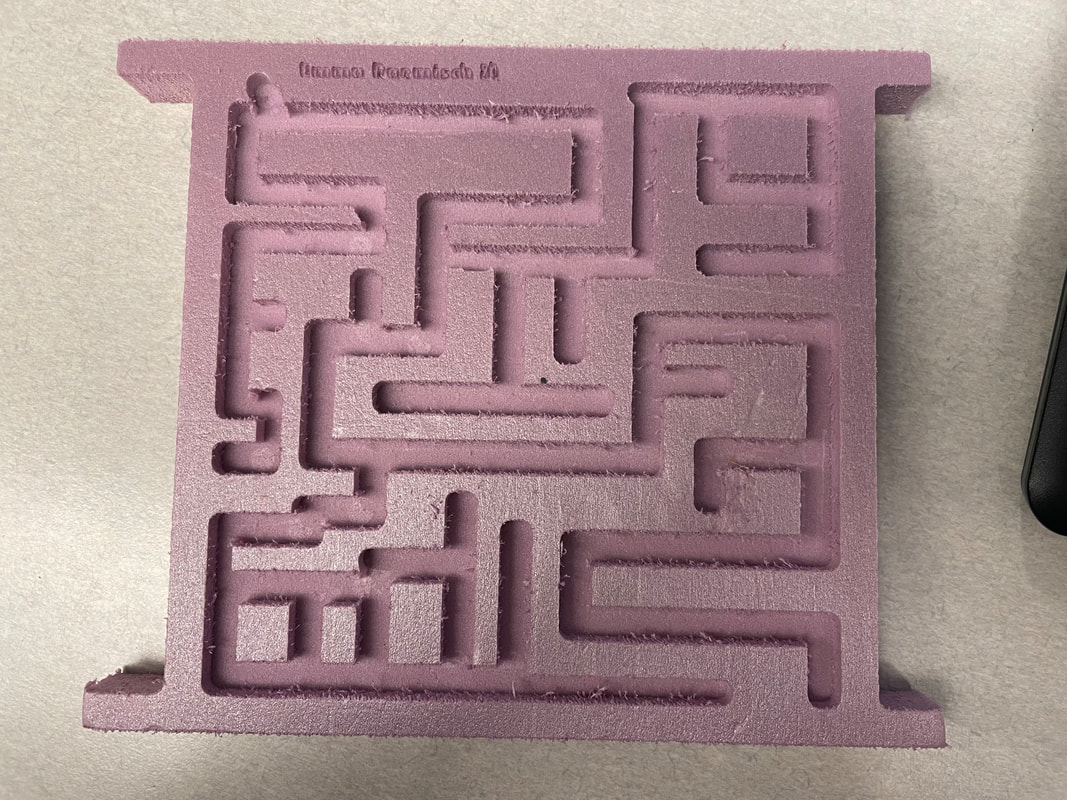
The last step of this process was to have my name and hour engraved into my maze. This time, I did it correctly the first time.
WHAT I LEARNED
I learned so much during this process. Mostly I learned how to use the router. Ms. Proctor gave us a demonstration on how to use the router, and I was able to figure it out after some trial and error with the programming. At this point, I think I know how to use every machine in the innovation center. I actually think it's really cool how much information I've learned over the past few months especially how at first I had no clue how to use any of the software or any of the machines, but now I can use pretty much all of it with little to no help. This project specifically helped me learn a lot more about fusion and how to use the contouring tool to create a tool path. Overall, this project taught me a lot.
