Notebook Decals
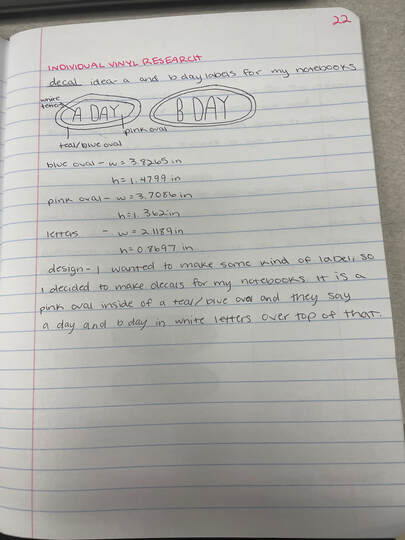
Here is my pre-research page I did in my designer notebook for the vinyl decal.


I used Illustrator to design my 3-color design for the decal. I decided to make the decals for my A and B day notebooks. On the right you can see how I separated the different colors to prepare the design to be cut out.


This is the actual process of cutting out the vinyl and applying it to my notebook. I cut out all of the different pieces and used transfer tape to apply them in the correct order. After that, I used transfer tape on the finished design to apply it to the actual notebook.
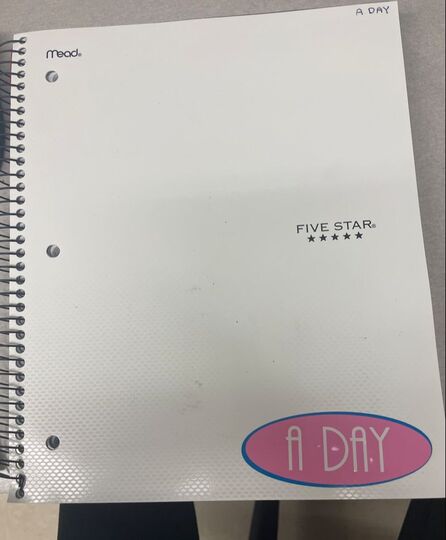
Here is the decal on my A Day notebook after it was completely finished!
WHAT I LEARNED
I learned so much about the vinyl cutter in this rotation. First of all, I learned how to actually use the vinyl cutter. Previously, when we had used it in class Ms. Proctor had done pretty much everything so I was very confused on what was going on. Once I had to use it myself, it was pretty challenging at first, but after messing around with it a little bit, and with the help of the handout, I was able to figure it out and I really like the way the final product looked. I also learned how to set up a design on Illustrator in a way where you can cut it out with the vinyl cutter. During this rotation, I learned a lot about the actual cutter and how to use it.
