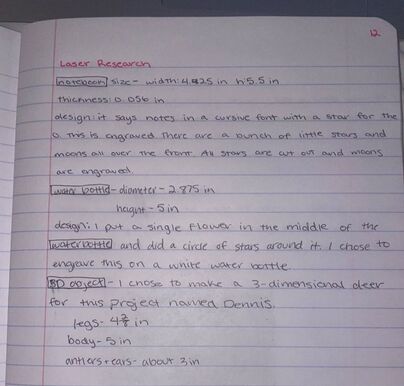
Here is my pre-search that I have in my designer notebook.
Notebook
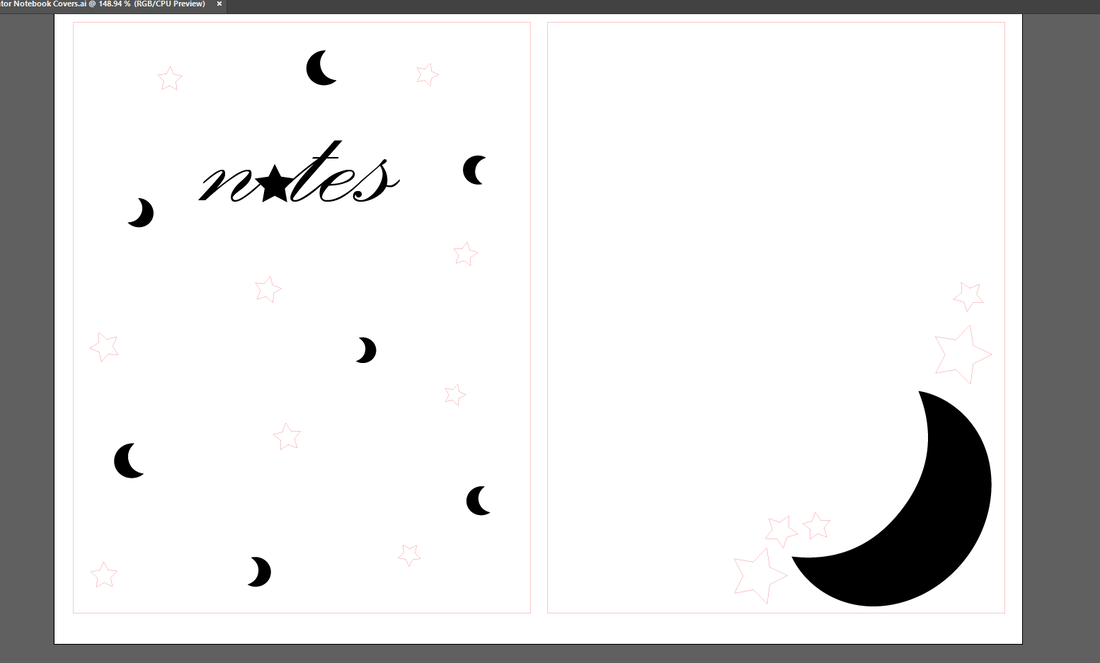

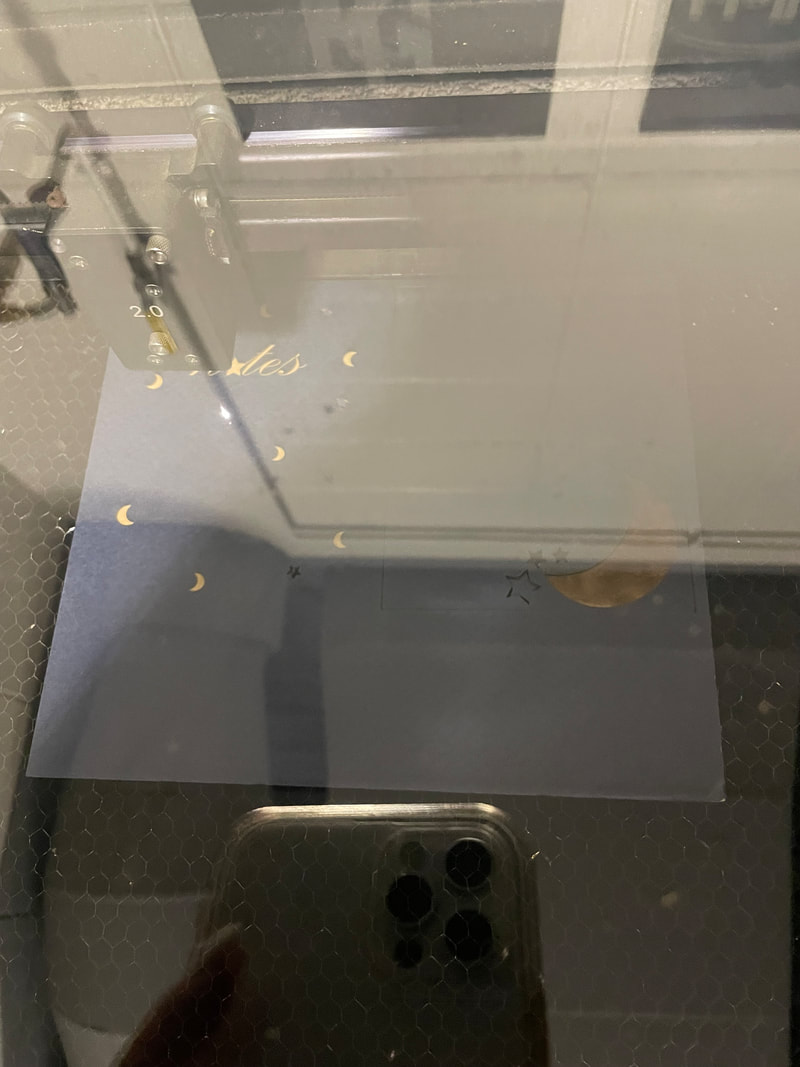
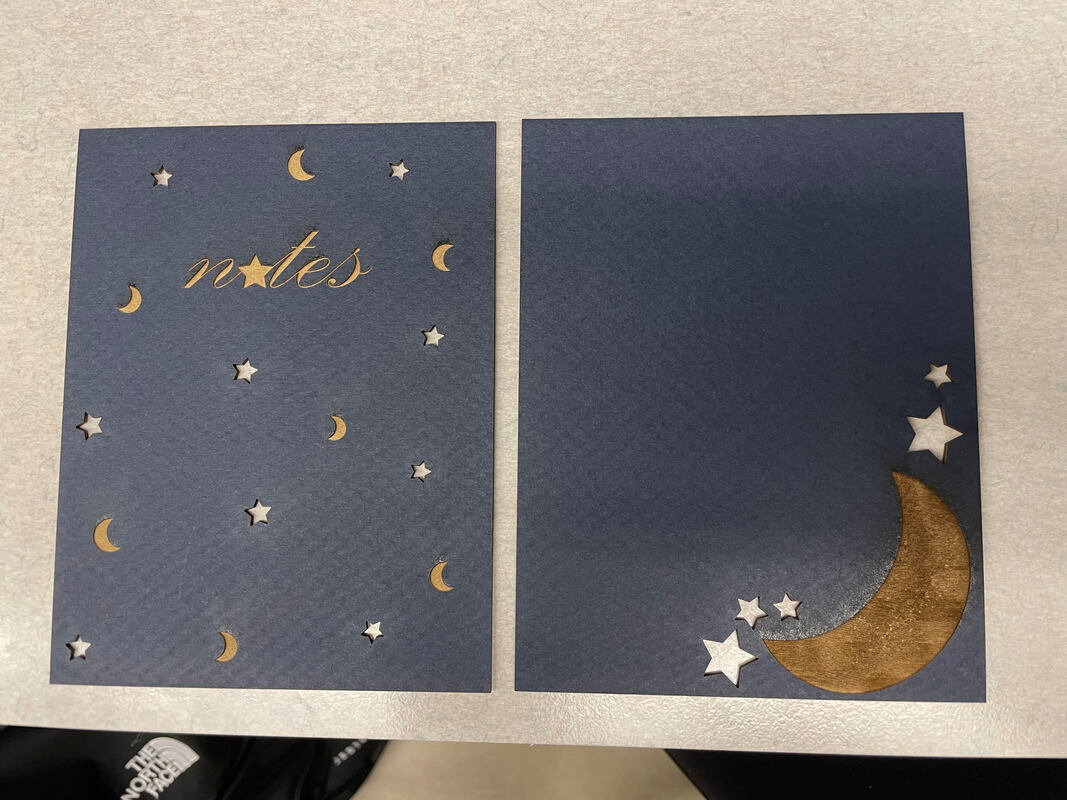
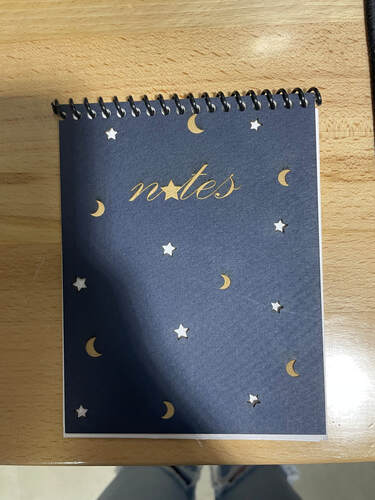
Here is the process it took to make my notebook. First, I designed it in Illustrator using the different colors to indicate if I wanted the shapes engraved or cut out. Then, I loaded it onto my flash drive and took it down to the laser. There, I cut out the notebook covers. Later, I cut the paper on the inside to the right size and used the hole punch to cut out all the holes. Then, I slid the spiral through the holes to create the finished notebook.
Water Bottle
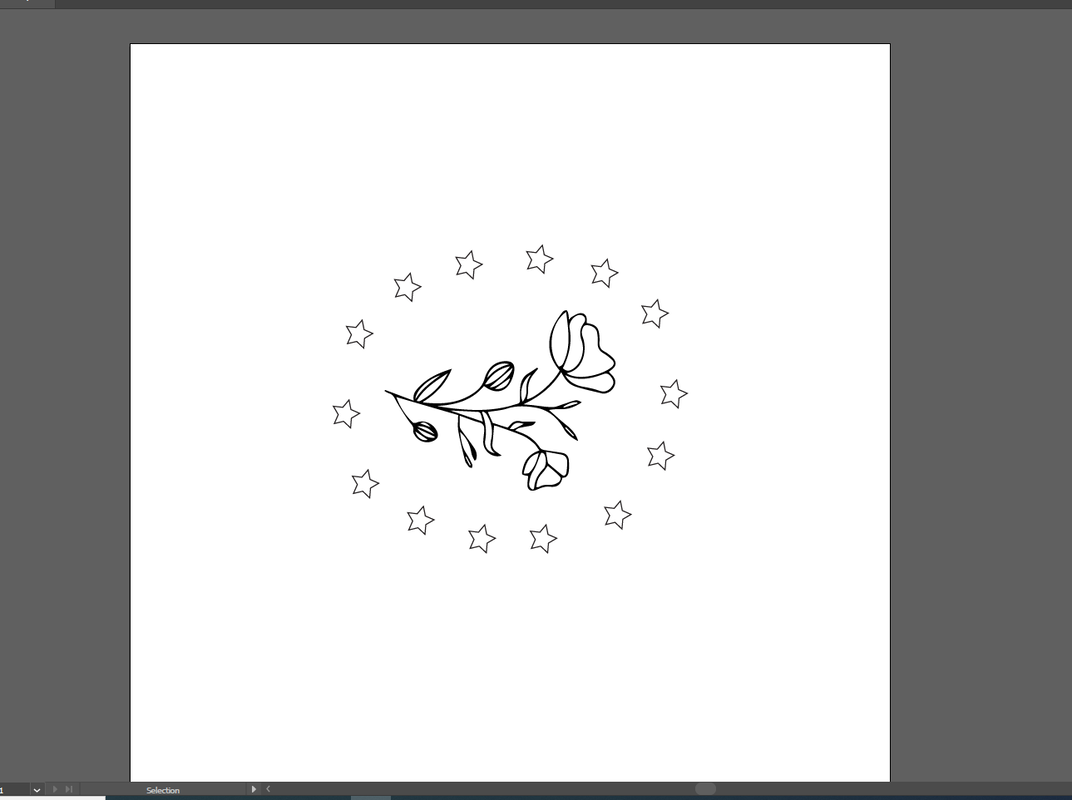

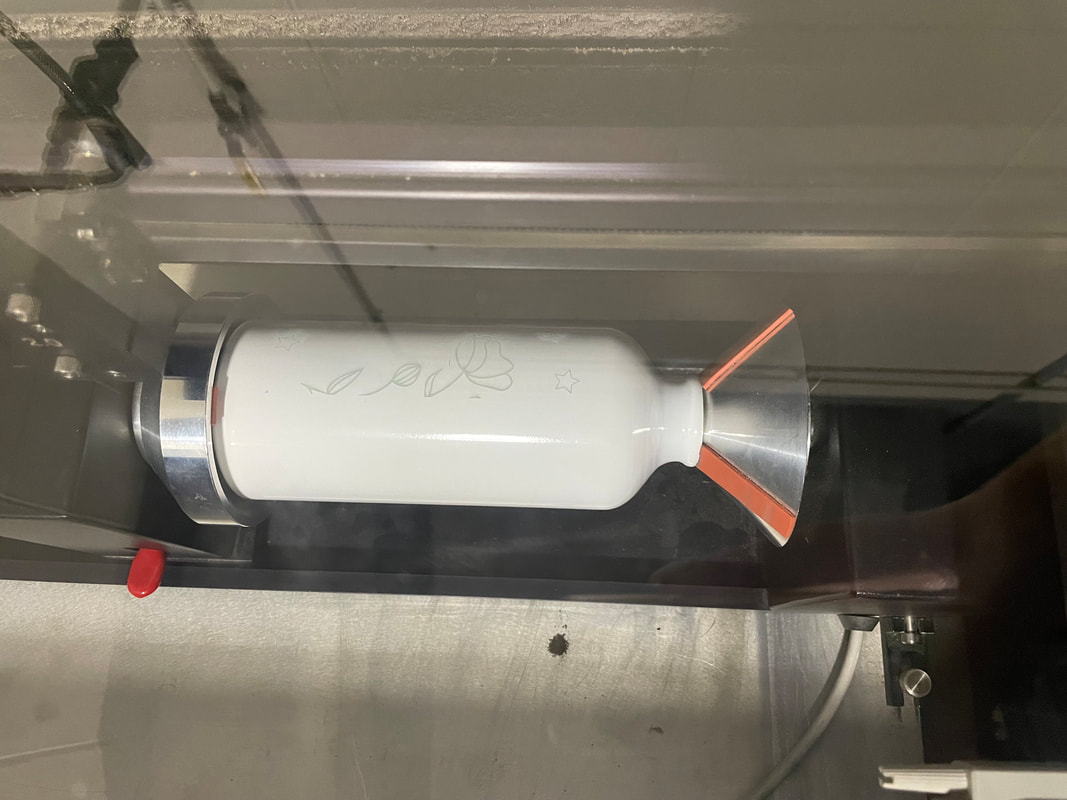
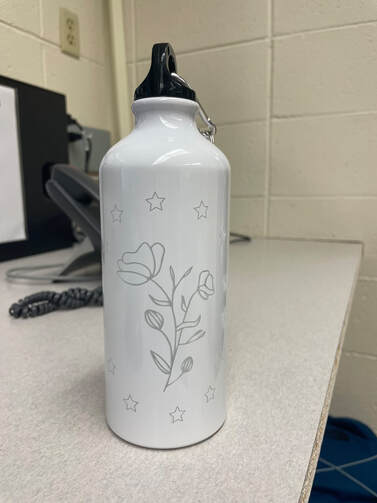
The next project I worked on was engraving the water bottle. This followed a very similar process to the notebook for the designing portion. Once I got down to the laser though, I had to put the rotary device into the laser so that the water bottle would turn while it was being engraved.
3-D Object
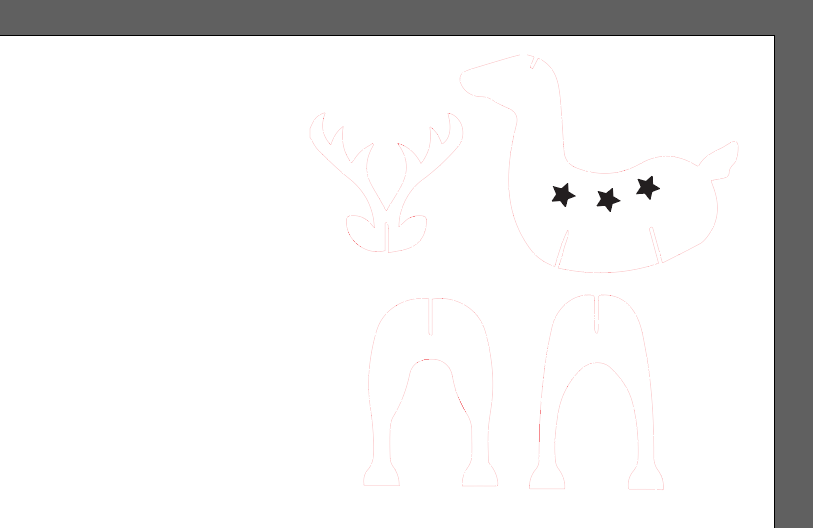
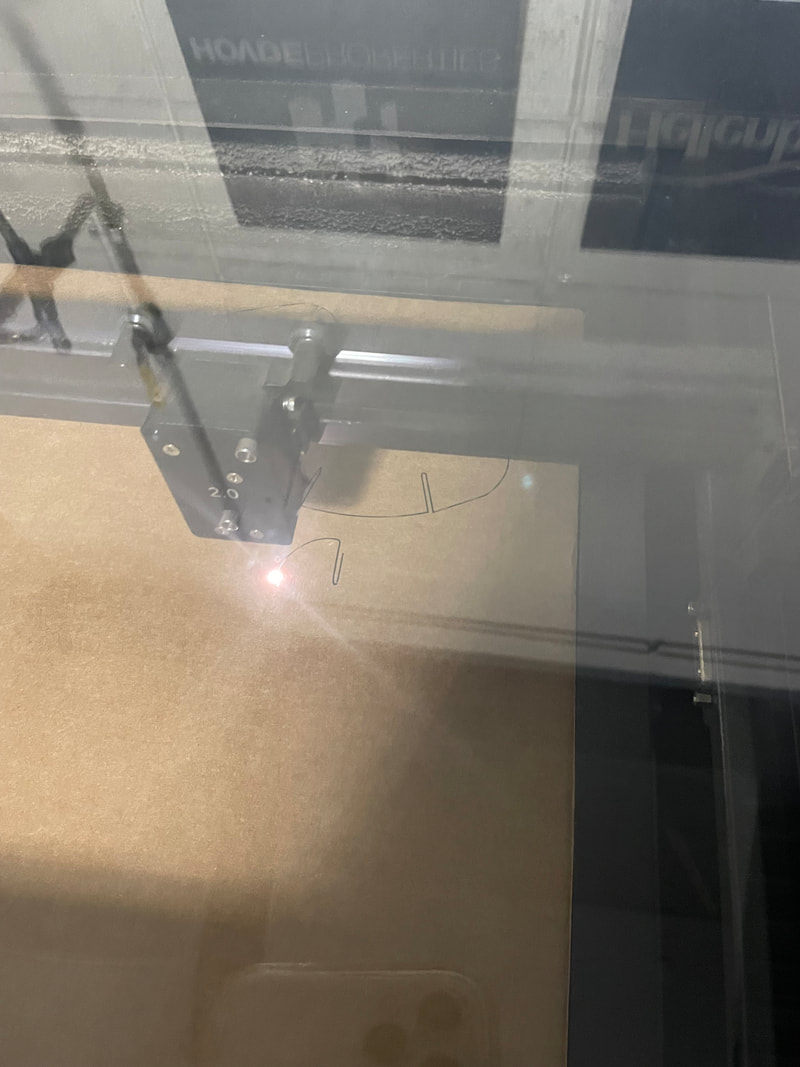
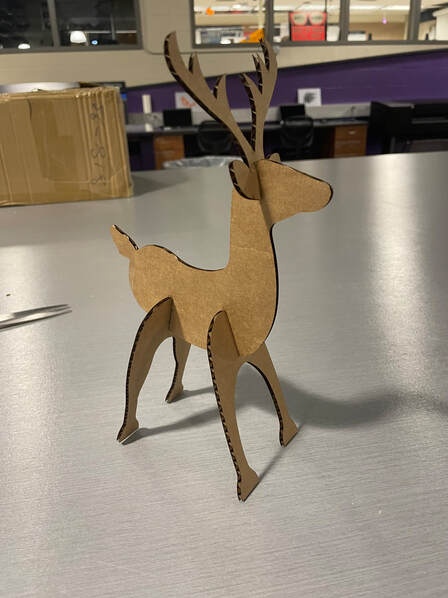
For this project, I had to use a template from google to help me with the design for the deer. After changing the fill of the shapes to none and the stroke to 0.0001 thickness and red, it was time to cut it out. Originally, I added stars to be engraved into the deer but I decided to remove them for the final project because it wouldn't work very well with cardboard as my material. I really like the way the finished product came out.
WHAT I LEARNED
During this rotation, I really learned how important it is to mange your time wisely. Wasting time, especially during this rotation could cause you to fall very behind, and make it incredibly difficult to catch up again. I also learned how to add the hole punches and spiral for the notebook and how to put the rotary device into the laser. Last but not least, I learned how to create a 3-dimensional object where the pieces can fit together on their own. During this rotation, being independent was very important because lots of people were at different places in the process of creating this objects. I learned even more about figuring things out on my own and I really like the way all of my projects turned out.
